
Anki Remote gives you more control over Anki with customizable shortcuts, Reveal Hint, Reveal Next Cloze, and AnKing-friendly button mappings. Here's how to install the add-on, customize your remote, and build a setup that fits your study workflow.
Anki Remote Add-on Guide
If you're using Anki regularly, you probably already know the basic shortcuts: Again, Hard, Good, Easy, Sync, Undo, and Browse.
But the Anki Remote add-on can do more than control your basic review buttons.
It can also make certain Anki workflows easier by giving your StudyRemote (formerly Anki Remote) additional controls for features such as Reveal Hint and Reveal Next Cloze.
In this guide, we'll cover some of the most useful Anki Remote add-on shortcuts and how they can make repetitive review tasks easier.
Disclaimer: This is curated mostly towards medical students. However, maybe you will find something cool :)
Disclaimer 2: Haven't installed the add-on yet?
You can download it through AnkiWeb or use add-on code 693153301.
Anki Remote Add-on Shortcuts
Common Anki Remote Controls
| Function | What it does |
|---|---|
| Again | Mark a card Again |
| Hard | Mark a card Hard |
| Good | Mark a card Good |
| Easy | Mark a card Easy |
| Sync | Sync your Anki collection |
| Undo | Undo your previous action |
| Decks | Open your deck list |
| Browse | Open the browser |
| Edit Card | Edit the current card |
| Add Card | Add a new card |
How to program and customize each button on your Anki Remote
The default button layout works for most users out of the box — but the reason the Anki Remote add-on exists is that "most users" isn't "you." Here's how to reassign every button to whatever function actually fits your review style.
Opening the add-on config
- Open Anki desktop.
- Go to Tools → Add-ons.
- Select Anki Remote in the list and click Config at the bottom right.
A dropdown menu appears for each button on the remote. That's your customization panel.
What each dropdown does
Every physical button has its own dropdown with the full list of available Anki actions. Select an action from the dropdown, click OK, and the button is remapped. Changes take effect immediately — no Anki restart required for most functions (add-on updates being the exception).
The full list of assignable functions:
- Review actions — Again, Hard, Good, Easy, Show Answer, Undo, Bury Card, Bury Note, Suspend Card, Suspend Note, Flag (with color options), Mark Note
- Navigation — Next Card, Previous Card, Return to Deck List, Open Browser, Open Add Card window, Open Edit Card window, Sync
- Cloze and reveal — Reveal Hint (opens extras/hint fields), Reveal Next Cloze (advances through multi-cloze cards), Toggle Answer Field
- Media — Play Audio, Replay Audio, Toggle Mute
- Custom — Send Custom Keystroke (for shortcuts specific to other add-ons you use)
Testing your changes
After remapping, open any deck and press the button you just reassigned. If nothing happens:
- Make sure Anki is the active window on your screen (the remote sends keystrokes to whatever app has focus).
- Confirm the remote is in Key Mode, not Game Mode — the mode slider on the back of the remote must be down.
- Restart Anki if you assigned a function that requires it (uncommon, but the add-on will prompt you).
- Check the Anki version — the add-on requires Anki 2.1.50 or newer for full functionality.
- On iPad? Note that the add-on config is desktop-only — see our iPad connection guide for what works natively without the add-on.
Recommended starting customizations
If this is your first time in the config panel, don't remap everything at once. Start with these three changes — they cover the friction points most users hit within the first week:
- Set the left joystick to Undo. By far the most-requested change. You will misclick Good instead of Hard often enough that quick-Undo access is more valuable than any other custom function.
- Assign a dedicated button to Reveal Hint if you use decks with extras fields (AnKing, First Aid, Sketchy references).
- Set the secondary button to Bury Card for cards you don't want to see again today but don't want to fail either.
Everything else — flagging, custom keystrokes, deck-switching — can stay on keyboard shortcuts. Only remap what you'll actually use every session.
How mappings persist
Your custom mappings are stored in the add-on config file, which lives in your Anki profile. This means:
- Mappings survive Anki restarts and desktop reboots.
- Mappings do not sync via AnkiWeb — they're desktop-local, so if you use Anki on multiple computers, you'll need to configure each one.
- Mappings persist through Anki updates but may reset after major add-on updates — check your config after each add-on update.
Advanced: sending custom keystrokes
The "Send Custom Keystroke" option lets you bind any keyboard shortcut to a button. This is how you extend the remote to work with other add-ons — for example, if you use the ReviewHeatmap add-on and want a button to open the heatmap view, or if you use a custom add-on with its own shortcut, bind it to a spare button here.
Format: enter the keystroke as it appears in Anki (e.g., Ctrl+Shift+F for Flag Red on Windows, Cmd+Shift+F on Mac). The add-on translates the button press into that keystroke every time.
Advanced Anki Remote Features
Reveal Hint
Availability: All devices
Button: Move the joystick to the right
What it does: Reveal closed or hidden notes associated with a card, such as First Aid, Sketchy, or additional resources.
Why it's useful: Instead of reaching for your keyboard, you can reveal supporting information directly from the StudyRemote controller.

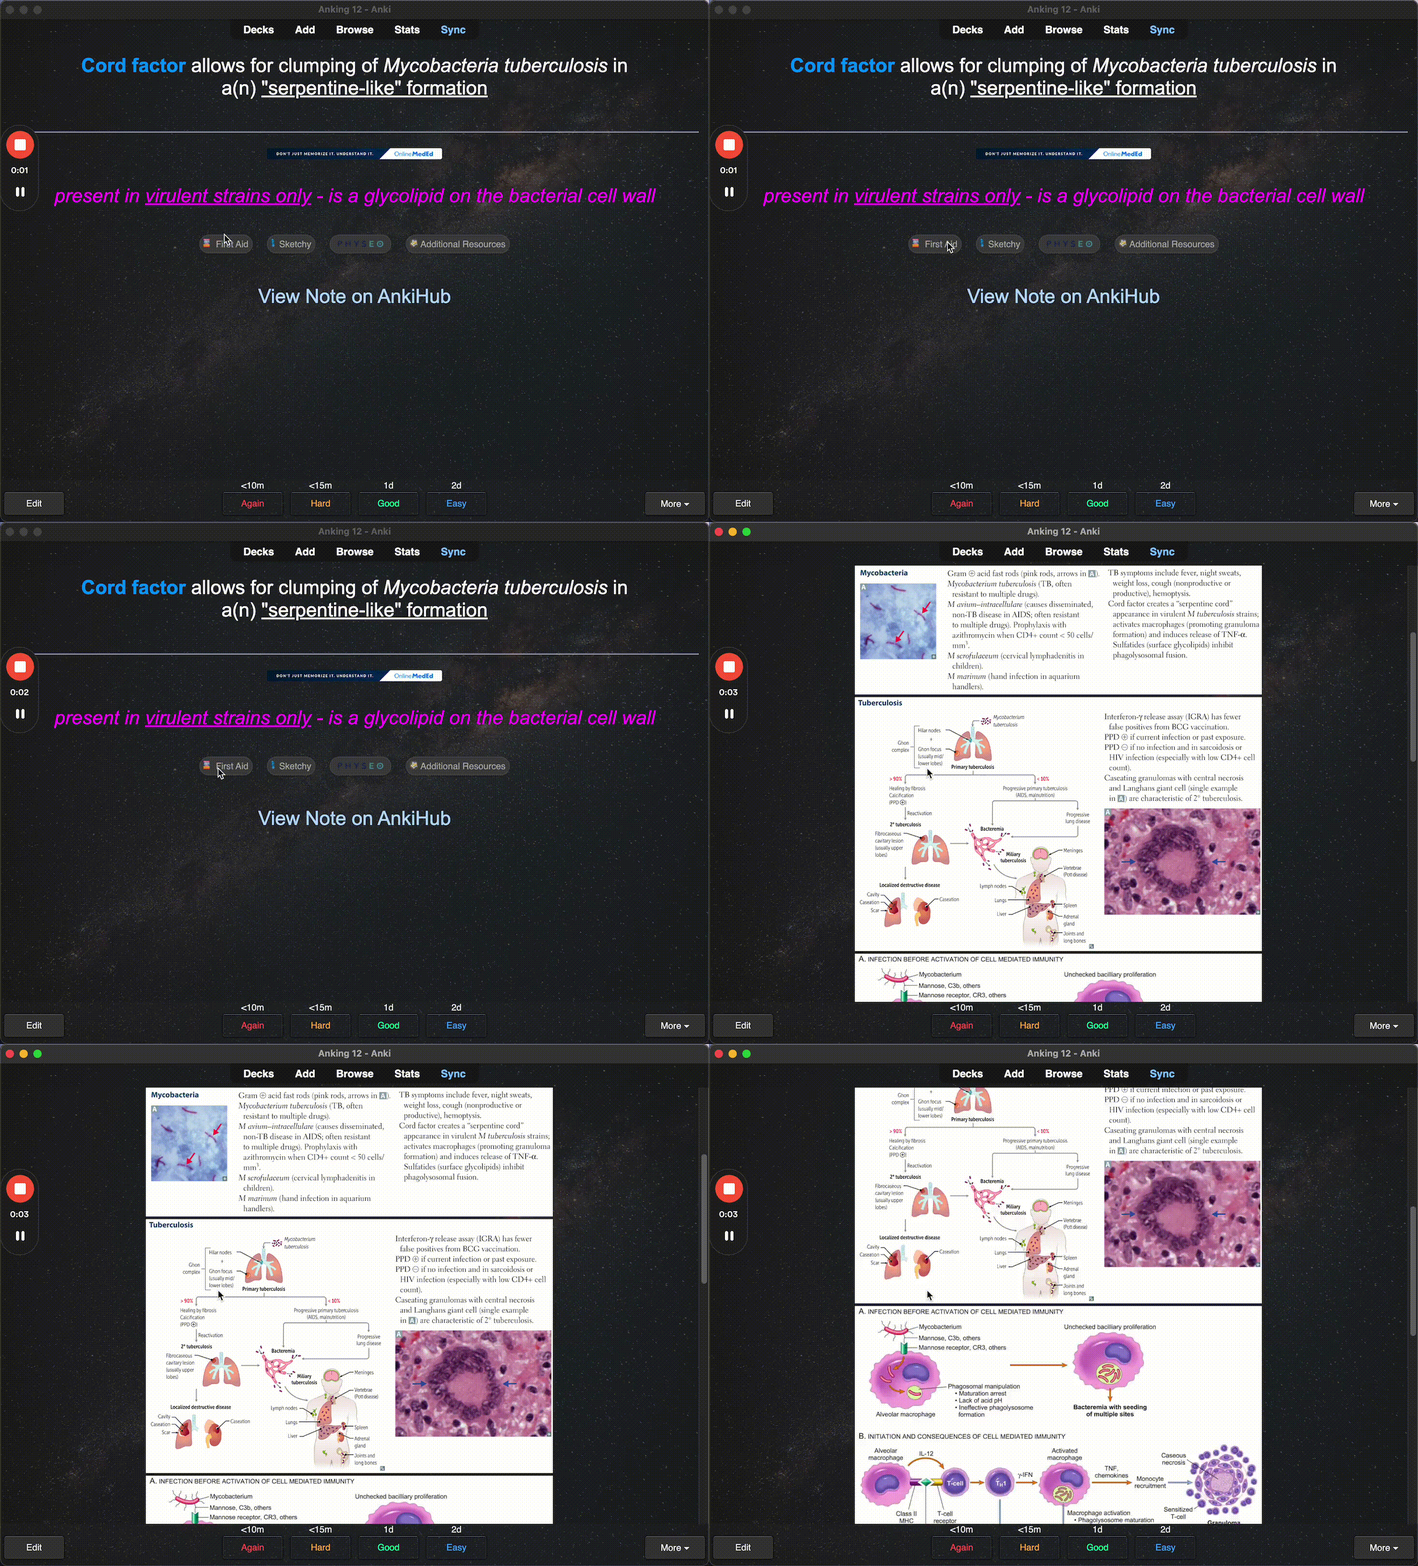
Reveal Next Cloze
Availability: Mac and Windows
Button: Customizable through the add-on
What it does: Reveals the next cloze deletion when working with AnKing-style cards.
Why it's useful: When a card contains multiple cloze answers, you can move through them without repeatedly reaching for your keyboard.

How to configure the Anki Remote add-on for AnKing decks
AnKing is the most-used community deck among medical students, and it's the deck the Anki Remote add-on was largely designed around. If you're doing AnKing daily — whether for Step 1, Step 2, or Step 3 dedicated — here's the button configuration that works best.
Why AnKing needs custom mapping
AnKing cards are cloze-heavy, image-dense, and packed with extras fields (first aid page numbers, sketchy references, mnemonics, mechanism explanations). The default remote layout handles the basic Again/Hard/Good/Easy grades fine, but three AnKing-specific workflows benefit hugely from custom buttons:
- Multi-cloze cards with 3+ cloze deletions per card — you need to reveal each one in sequence.
- Extras fields with supplementary references you want to peek at without leaving the card.
- Sibling burying to prevent cards on the same fact from stacking in the same session.
The default mapping doesn't cover any of these efficiently. Custom mapping does.
Recommended AnKing button layout
Open the add-on config (Tools → Add-ons → Anki Remote → Config) and set:
- Main button — Show Answer / Good (the standard progression)
- Left button — Again
- Right button — Hard
- Top button — Easy
- Left joystick (right direction) — Reveal Hint (opens the extras field)
- Left joystick (up direction) — Reveal Next Cloze (advances through multi-cloze cards)
- Left joystick (down direction) — Undo
- Secondary button — Bury Sibling Cards
This layout keeps your thumb on the main button 90% of the time, uses the joystick for cloze/hint reveals during answer checking, and reserves the secondary button for the one non-review action (Bury) that comes up daily on AnKing.
Working through multi-cloze AnKing cards
For cards with multiple cloze deletions:
- Press Show Answer to see the first cloze.
- Nudge the joystick up to reveal the next cloze.
- Repeat until all clozes are revealed.
- Grade the card as normal (Again/Hard/Good/Easy).
Without the remote, this workflow requires reaching for spacebar → tab through clozes → arrow keys. With the remote, it's all one hand.
Using Reveal Hint for AnKing extras
AnKing cards typically have an "Extras" field with:
- First Aid page numbers and section references
- Sketchy scene descriptions
- Mnemonics and memory hooks
- Additional mechanism details
Set the joystick-right to Reveal Hint to peek at this field without leaving the card. Useful for confirming details when you almost got the card right but want to check the supplementary explanation before grading.
Bury Sibling Cards — the underrated AnKing setting
AnKing generates multiple cards per note (front-back, cloze variations, image occlusions on the same diagram). Without Bury Siblings, you can end up seeing three cards on the same fact within a single review session — which inflates your correct percentage but not your retention.
Bind a button to Bury Sibling Cards so you can quickly bury the current note's other cards when you realize you just saw a sibling. This works alongside Anki's built-in "Bury related new cards until the next day" deck option (which we recommend enabling as well).
Recommended add-ons that pair with this configuration
If you're customizing for AnKing, these three add-ons stack well:
- Image Occlusion Enhanced (code 1374772155) — Essential for AnKing anatomy and pathway cards.
- Advanced Browser (code 874215009) — Manage the 30,000+ card AnKing deck without going insane.
- Straight Reward (code 456451372) — Rewards streaks with slightly longer intervals; useful once you're in a steady AnKing rhythm.
Install codes go in Tools → Add-ons → Get Add-ons, same as the Anki Remote add-on.
Troubleshooting AnKing-specific issues
- Reveal Next Cloze doesn't advance — Check that the card actually has multiple clozes (some AnKing cards are single-cloze despite looking multi-part). If the card has only one cloze, there's nothing to reveal next.
- Reveal Hint shows nothing — The card's extras field is empty. Not every AnKing card has extras filled in.
- Sibling burying not working — Confirm Bury Sibling Cards is assigned to a button in the config (not just enabled in deck options). Both settings work together.
For a deeper dive into AnKing itself — deck structure, tagging, subdeck organization — see the AnKing v12 documentation on ankihub.net.
How to Set Up the Anki Remote Add-on
Then give a very simple sequence:
- Open Anki.
- Go to Tools → Add-ons.
- Select Get Add-ons.
- Enter the add-on code.
- Restart Anki if required.
- Configure the available controls.
- Test the assigned buttons during a review session.
Who Should Use the Anki Remote Add-on?
The add-on is particularly useful if you:
- Review large Anki decks regularly
- Use AnKing or other cloze-heavy decks
- Frequently use Reveal Hint
- Want fewer keyboard shortcuts during reviews
- Spend long periods reviewing flashcards
For occasional Anki users, the standard keyboard shortcuts may be all you need.
